

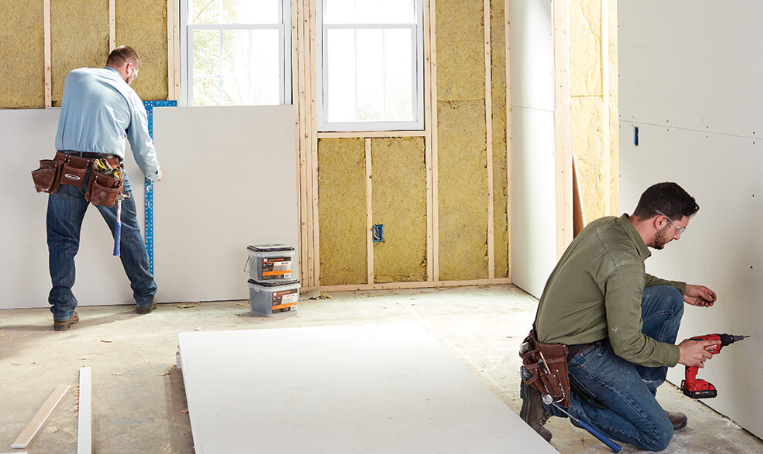
A hole from a doorknob. A crack above the window. A water stain that keeps spreading. Every home collects wall damage sooner or later, and in Georgia, where high humidity and heavy rain can damage interior spaces. The good news? You can learn to install and repair drywall yourself with basic tools, a little patience, and the right steps.
Not every wall repair is a simple weekend project. If the damage is extensive, involves the ceiling, or you want a smooth, flawless finish, a professional Drywall Installation and Repair Service can save you time and effort. Here, we will cover both types of work, explain which supplies you need, and help you know when it is better to call a professional.
Tools You Need to Install and Repair Drywall
Gather everything before you start. It saves time and frustration.
- Drywall sheets (1/2-inch is standard for walls)
- Drywall screws and a screwdriver or drill
- Utility knife and drywall saw
- T-square or long straightedge
- Joint compound (mud) and paper or mesh joint tape
- 6-inch and 10-inch taping knives
- Sanding sponge or pole sander (120 to 220 grit)
- Primer and paint
- Dust mask and safety glasses
Read Also : What Are the Benefits of Regular HVAC Cleaning?
How to Install Drywall: Step by Step
Step 1: Measure and Cut
Measure the wall area and mark the sheet with a pencil. Score the paper face with a utility knife along a T-square, then snap the board backward and cut the paper on the back. Cut openings for outlets and switches carefully.
Step 2: Hang the Sheets
Position the sheet against the studs. Hang ceilings first, then walls. Install sheets horizontally when possible, which means fewer seams. Keep edges tight but not forced, and leave a small gap at the floor.
Step 3: Screw It In
Drive screws every 12 to 16 inches into the studs. Sink each screw just below the surface without tearing the paper. A dimpled screw head is perfect. A broken one won’t hold.
Step 4: Tape the Seams
Spread a thin layer of joint compound over each seam, press the tape into it and smooth it flat. Cover the tape with a light coat and let it dry fully.
Step 5: Add Coats and Sand
Apply two or three thin coats of compound, widening each one slightly so the seam blends in. Sand lightly between coats, then wipe away the dust. Thin coats beat thick ones every time.
Step 6: Prime and Paint Your Newly Installed Drywall
Prime the wall first. Skipping primer makes patched areas show through the paint. Then paint as usual.
How to Repair Drywall: Common Fixes
Fixing Nail Holes and Dents
Scoop a little joint compound onto a putty knife, fill the hole, and scrape it flat. Let it dry, sand it smooth, and touch up the paint. This takes about 15 minutes of work.
Repair Drywall Cracks
Cut along the crack with a utility knife to remove loose material. Apply mesh tape over it, cover with compound, and feather the edges. Sand and paint once dry. If the crack keeps returning, the house may be shifting or settling, so have a pro take a look.
Repair Drywall Medium Holes (Doorknob Size)
Use a self-adhesive patch. Press it over the hole, cover it with compound, and feather the edges outward. Add a second coat once the first dries, then sand and paint.
Patching Large Holes
Cut a clean square around the damaged area. Add wood strips behind the opening for support. Cut a matching piece of drywall and screw it into place. Cover the seams with tape, apply thin layers of joint compound, sand the area, then prime and paint it.
Water Damage
Find and fix the leak first, or the damage will return. Cut out any soft, stained, or moldy drywall, let the area dry completely, then patch as you would a large hole. Widespread mold or repeated leaks call for a professional.
Pro Tips to Install and Repair Drywall Like an Expert
- Feather your edges. Wide, thin coats hide seams better than thick, narrow ones.
- Let it dry. Rushing the next coat causes bubbles and cracks. In humid Georgia weather, allow extra drying time.
- Sand gently. Too much pressure digs into the paper and leaves marks.
- Use a light. Shine a flashlight across the wall at an angle to spot flaws before you paint.
- Match the texture. If your walls have texture, use a spray can or brush to blend the patch.
Safety First When You Install and Repair Drywall
Wear a dust mask and safety glasses when sanding. Drywall dust can harm your lungs and eyes. If your home was built before the 1980s, old paint or ceiling materials may contain lead or asbestos. Test them before sanding or cutting. Also, check for wires and pipes before cutting into a wall.
When to Call a Pro to Install and Repair Drywall
DIY works well for small and medium repairs. But some jobs need a professional:
- Large areas damaged by water or mold
- Large ceiling repairs
- Full room drywall installation
- Homes with possible asbestos or lead
- Cracks that keep coming back
A skilled professional can work faster, create smooth seams, and help avoid costly mistakes. Before hiring, ask for a written estimate, proof of insurance, and photos of past work.
Summary
Now you know the basic steps for drywall installation and repair. Start with small repairs and take your time. Apply joint compound in thin layers and let each layer dry before adding more. Sand the area gently to create a smooth surface.
Do not rush the job. Taking your time can help prevent bumps, cracks, and visible seams. With care and patience, you can make the repaired area blend with the rest of the wall. For large or difficult repairs, it is better to call a professional.
